Growing Herbs from Seed: the Direct-Sow Method

Many herbs are easy to grow from seed. You can start seeds two ways:
- Start them indoors and transplant them into permanent spots when they're large enough
- Sow seeds directly into garden beds or containers when the temperatures are warm enough
Here we'll focus on the direct-sow method, which works well for growing herbs throughout the season.
What to grow
Consider what you plan to use your herbs for. For example:
| If you enjoy… | Try growing… |
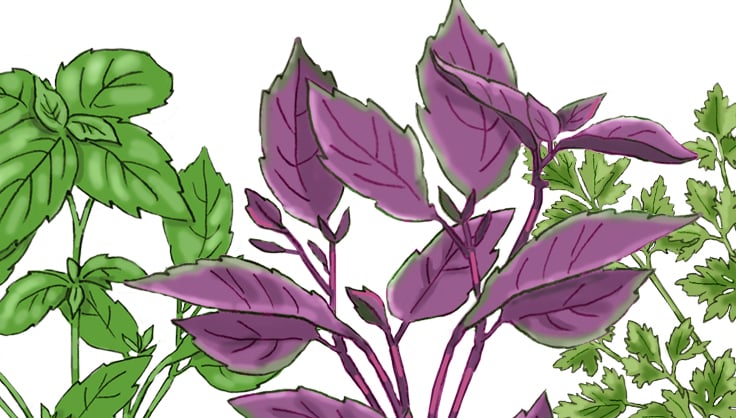
| Bruschetta | Genovese basil, purple basil |
| Brewing teas or flavoring water | Pineapple sage, lemon balm, chamomile |
| Creating simple syrups | Lemon verbena, pineapple sage, mint |
| Flavoring cocktails | Peppermint, rosemary, basil |
| Add flavoring to meals | Basil, parsley, chives, sage, Thai basil |
| Having dried herbs available in your pantry | Dill, oregano, parsley, bay leaf, thyme |
| Creating sachets or potpourris | Lavender, assorted scented geraniums, lemon balm, apple mint, banana mint |
| Creating an outdoor space to deter mosquitoes | Citronella geranium, lemongrass |
Did you know?
People grow herbs to add flavoring to meals. Specific cuisines usually call for certain herbs to flavor dishes. When it comes to cooking, chefs may opt for fresh herbs to add to meals because they include more of the “flavor” and oils that can be lost when herbs are dried. Dried herbs, however, can be stronger than fresh herbs, so you use less.
What type of soil and light do herbs need?
Most herbs thrive in well-draining soil mixed with compost, and in at least 8 hours of full sun. Depending on the variety, some herbs prefer consistently moist soil while other herbs prefer to dry out a little between waterings, so be sure to check what type of conditions the herbs you'd like to grow need.
Where to begin?
Assess your space. Do you have a sunny windowsill, a back patio, or space in the garden where you can create a raised bed? Combine your available growing conditions with your herb preferences and choose the best container or garden spot to grow them. Here are some options:
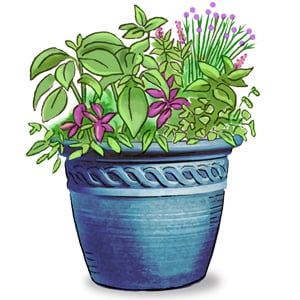
Sowing seeds in containers
For patios and balconies, you can grow your herbs in grow bags, or self-watering planters. Even if you have access to a garden, you may still opt to grow food this way. It allows you to plant on paved areas, place herbs in the sunniest spots, and customize the soil easily.
- Self-watering planters
Herbs that like moist conditions and a continuous supply of water will benefit from self-watering planters (such as chervil and basil). These planters are ideal for spots that are hard to reach with a garden hose or if your schedule keeps you on the go. Self-watering planters help ensure that the plant will not dry out suddenly in the heat, thanks to a base reservoir and capillary strip or mat that facilitates gradual water absorption.
Plants grown in self-watering planters benefit from a self-watering potting mix, a light soil blend that encourages plant roots to grow without unnecessarily retaining water. - Grow bags
Herbs that prefer to dry out between waterings (such as rosemary, sage, or thyme) will benefit from grow bags, as any excess water drains away quickly through the fabric sides and base. The fabric walls also “air-prune” roots — meaning that root ends will self-prune rather than grow around the pot causing the plant to become root-bound. Grow bags can also be grouped together to grow multiple herbs.
For both self-watering planters and grow bags, you can sow a mixture of herb seeds together. Check the seed packets for growing information, or refer to the chart below to see which herbs group well in moist soil and which ones do well in dry soil
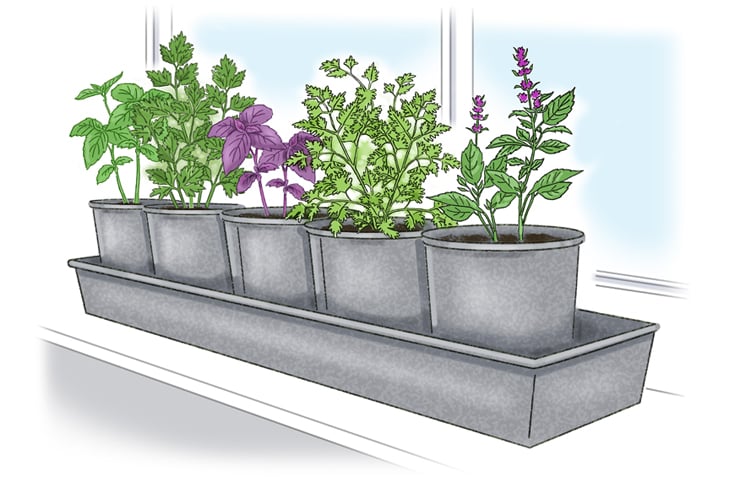
- Windowsill containers
Indoors, you can grow individual herbs on a windowsill in single pots. Terra cotta pots allow the soil to dry out quickly, while metal or plastic planters will keep the soil moist a bit longer. Regular potting soil works well for these types of planters.
Small containers (4-6") are ideal for growing dwarf and compact herb varieties, such as globe basil. You can also sow seeds of varieties that will get a bit larger, but you don't need to wait until they reach full maturity before you start using them (such as parsley or cilantro). Simply snip a few leaves when you need to add an ingredient to your meal.
Let’s get planting!
When sowing several seed varieties together in one container or garden bed, group plants together based on their needs. Consider first the type of soil and moisture the plant prefers. Herbs that do well with more moisture, such as basil and parsley, can be interplanted, but would not be planted together with herbs that like to be on the drier side, such as rosemary and lavender.
Also consider the type of light the herbs prefer, grouping full sun and part sun varieties together. As the growing season progresses, you can add an All-Purpose Fertilizer to your planting – look for one that will provide a long-lasting, slow release of nutrients. (Fertilizing herbs works especially well in containers, since the soil’s nutrients can be used up or washed away with watering.)
When you’re ready to sow:
1. Place your container of choice in its final growing location. Before adding your soil, check if it feels fluffy and moist. If the soil is dried out, add water and mix to moisten (this will help your seeds sprout).
2. Add your soil.
- If planting in a grow bag: Fill your container with potting mix until it is ¾ full. You can blend in compost in this stage for herbs that like extra moisture, or perlite for plants that prefer to dry out quickly.
- If using a self-watering container: Fill your container with self-watering potting mix until it is ¾ full.
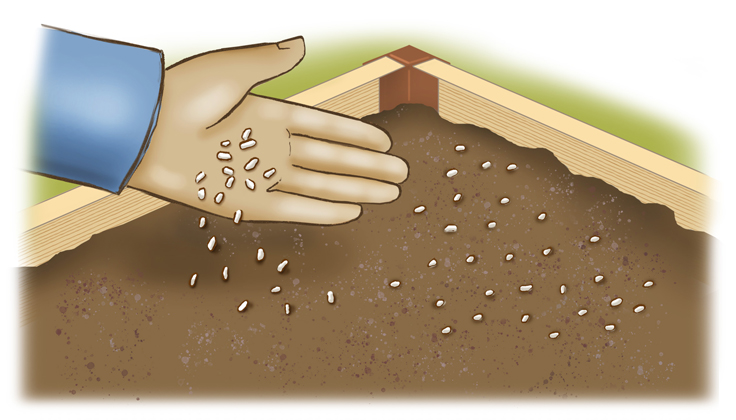
3. Take your chosen herb seed, and follow the package directions for sowing. Scatter the seeds (also known as “broadcasting”) on top of the soil and cover them with the recommended depth layer (for example, ¼” of soil).
- When broadcasting seeds, you want to spread the seeds out over the soil as evenly as you can. Avoid dropping all the seed in one corner or section of the pot. You do not need to sow the entire packet of seeds – just enough to cover the surface area of the container.
- If you're sowing more than one variety in your container, divide the planting areas up. For example, if you're growing two types of seeds, sow one variety on the one side, and the second variety on the other.

4. Use a watering can with a rose attachment, or a garden hose on the mist setting, to gently water your seeds.
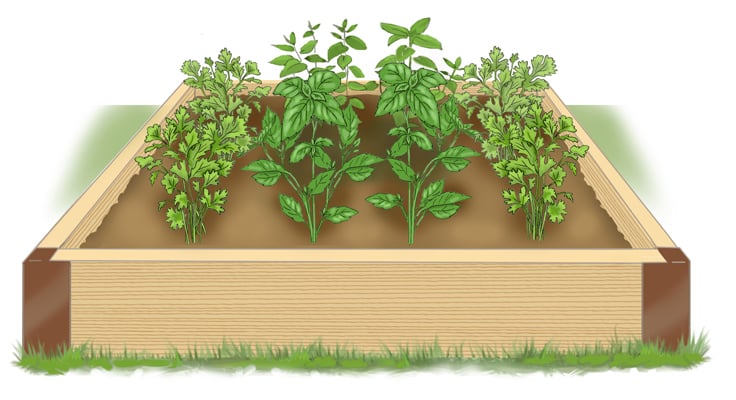
Sowing seeds in raised beds
Raised beds are ideal for when you have more space and can create a permanent garden. You can customize and choose the soil you plan to fill your raised beds with, so if you are starting on land with less than ideal conditions, raised bed gardening allows you to get right to work.
Choose a rot-resistant wood for your raised bed, such as cedar or cypress. For height, use planks that are at least 7-12 inches tall.
When setting up your spot, you will want to factor in the following:
- Lighting: Do you get full sun or part sun? Most herbs need at least part sun to thrive.
- Moisture: Will your raised bed be located on higher ground, so water can drain away? Does the spot flood easily after a rainfall? (If yes, you may want to choose an area that drains better.)
- Soil: Unless you have ideal garden soil, you'll want to create or purchase a soil amended with nutrient-rich compost.
- Broadcast as described above for containers or plant in rows.
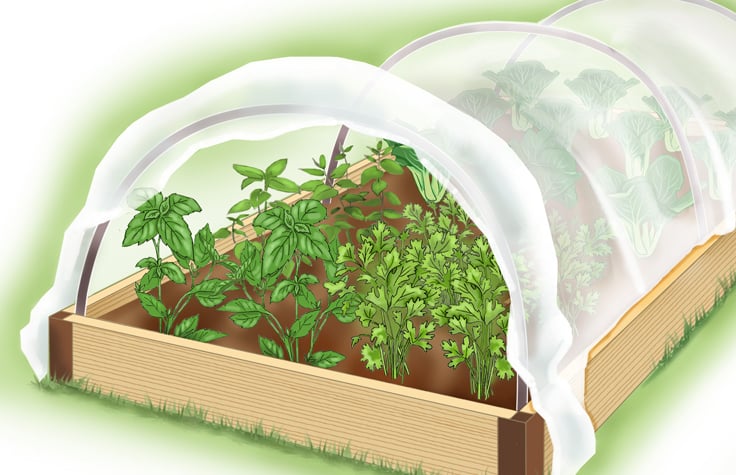
Protect your seeds
To protect the seeds (from both weather and wildlife) as they sprout, it's best to cover your raised bed with some type of row cover. Check on the seeds daily. If the soil is dry to the touch, water it gently. As seedlings begin to emerge, make sure the soil is kept moist.
Keep the row cover on until the seedlings have their first true sets of leaves. (The first “leaves” on a seed are the cotyledon, which provides food for the seed as it grows. The first “true leaves” look different from the cotyledon, and will be similar to more leaves as the seedling grows.)
Once you’ve planted
To grow large, healthy seedlings into flourishing plants, use the following practices to help the them reach their full potential.
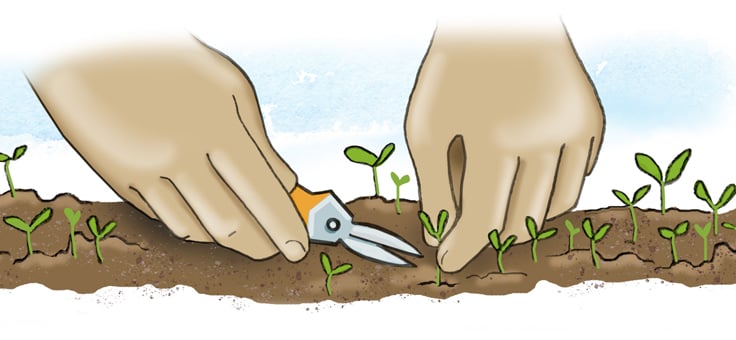
Thinning
As the seedlings grow, you should thin them to leave only the strongest plants. This reduces competition as the plants mature.
It’s ok if you sow more seeds than you need in the beginning, but you will need to thin them out to provide optimal growing conditions as the plants mature. Thinning out means removing the weaker or smaller plants so the larger plants can thrive. An easy way to do this is to take garden snips and cut the unwanted (extra) plants at the soil line. This prevents you from disturbing the roots of the seedlings you are keeping.
You can refer to the seed packet for recommended space between plants.
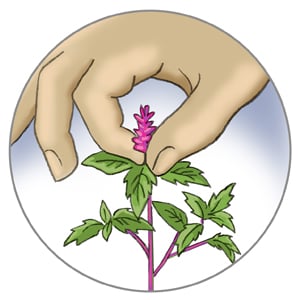
Pinching back
Just as the name implies, you can use your fingers to pinch off the growth on the plant’s stem when they reach about 4 inches tall (you can also use garden snips). This will signal to the plant to divert energy into growing side shoots in order to create bushier, sturdier herb plants, instead of tall, lanky plants.
How to do it? On the stem, look for where the leaves grow, called the leaf node. You will want to pinch the stem right above where the leaves grow.
Removing flowers
In addition to producing bushier plants, pinching is also necessary to prevent certain herbs from flowering (such as basil, cilantro, and oregano). By removing the flower buds, the plant’s energy is redirected into growing more flavorful leaves. Herbs that are allowed to flower often develop a slightly bitter taste. Removing flowers also prevents the plants from going to seed, a state where the plant stops focusing on creating leafy growth. (Note: This would not apply to herbs that you are encouraging to flower, such as lavender.)
Fertilizing
If you want to provide an extra nutrient boost, consider adding an all-purpose organic fertilizer to your planting area. Follow the directions on the package. For granular fertilizers, you can scratch a little into the soil surface. For seaweed fertilizers that are mixed with water, aim to apply in the morning hours so the scent has time to dissipate during the day.
Harvesting
How you're planning to use your herbs will influence how you harvest them. Many herbs can be grown as “cut and come again”, which means you harvest a portion of the plant but leave the rest in place for later use. Parsley is one herb that can be treated in this way. When harvesting this way, remove leaves and stems from the outside, leaving the center portion of the plant to continue to produce new growth.

Consider succession sowing
If you enjoy cooking with herbs regularly, consider staggering your plantings over several weeks to ensure a steady supply. This practice is referred to as “succession sowing.”
For containers, you can start herb seeds in additional containers, beginning 7 days after the last sown batch. As you harvest your herbs from one container, the second (or third, or fourth!) container will contain the next harvest.
You can also harvest a portion of the herbs in one area, instead of all at once. For this type of succession sowing, you concentrate on harvesting only one section of your herb planting, leaving the other side untouched. Let’s use dill as an example.
- If you have a row of dill, you can first harvest the left side of the row, leaving the right side in place. Since you have removed the dill plants from their original spot on the left side, you now have an open patch to sow new seeds.
- Make sure you remove the roots from this open space, and you can use a garden fork to loosen the soil. You can also add a little compost to this open space to provide new nutrition for the seeds you are planting.
- Sow your new seeds in this spot, and again follow the package directions for covering with soil. Water gently.
- As you continue to harvest your original herb planting, the new seeds will have an opportunity to start growing and will be ready for use when your original planting is harvested.
- Once you finish harvesting your original planting, you can repeat the steps above in the new open space.
Last updated: 11/16/2022
Print this Article:
Related Articles

Get the Dirt
Stay up to date on new articles and advice. Please fill out the information below.