Make Goat Cheese at Home

Homemade goat cheese, made with the Deluxe Cheese-Making Kit.
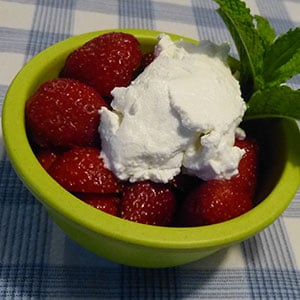
Fresh goat cheese with strawberries and mint
Love chèvre and want to make your own? I happily discovered that making rich, creamy goat cheese from our Deluxe Cheese-Making Kit is easy and rewarding. The kit contains all the ingredients and supplies you need — except the goats milk. The recipe for chèvre is not included in the kit, though, so read on!
To make my batch of chèvre, I purchased four quarts of fresh, pasteurized goat's milk at the local market. You can use farm-fresh goat's milk, if you have access to it. From start to finish, the entire cheese-making process took about two days, but most of that time was just letting the curd form and drain. The active time spent mixing ingredients and processing the curd was less than an hour. A gallon of milk yielded 1-3/4 pounds of goat cheese.
After the chèvre is finished, it's easy to add herbs or other ingredients. You can also form the cheese in a shaped mold or make an herbed roll. I've been enjoying it on bowls of fresh strawberries, garden salads, spicy chili, and scooped up with crisp tortilla chips and salsa. It's yummy by the spoonful, too.
Ingredients
- 1 gallon fresh goats milk, pasteurized
- 1/4 teaspoon calcium chloride liquid*
- 1/16 teaspoon C101 mesophilic culture*
- 1/4 teaspoon rennet* (1/4 tablet dissolved in 1/4 cup water)
- 3/4 to 1-1/2 teaspoons non-iodized salt
- * Included with kit
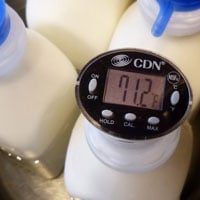
Warm the milk
Equipment
- Stainless steel, 6-quart pot, with lid
- Thermometer, included in kit, or use a digital one
- Colander, included in kit, plus an extra one
- Butter muslin, included in kit
- Stainless steel slotted spoon
- Stainless steel knife with a long blade, such as a bread-slicing knife
- Cheese mold, optional
Step 1. Warm the milk to 72 degrees F. I made this on a summer day, so leaving the bottles of milk on the kitchen counter was all I needed to do. If your kitchen is cooler, set the bottles into a pan of warm water. Put a thermometer into one bottle to monitor the temperature. Pour the warm milk into a 6-quart stainless steel pot.
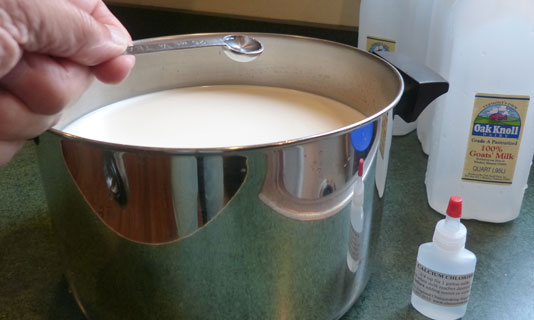
Add calcium chloride
Step 2. Add 1/4 teaspon of liquid calcium chloride and stir.
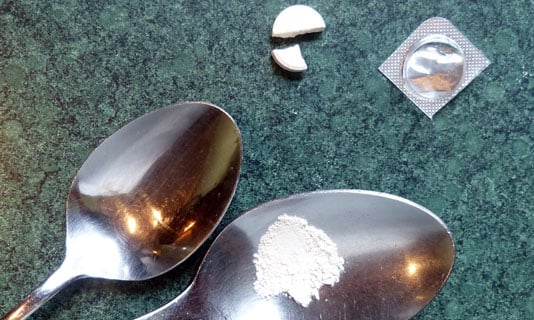
Crush the rennet

Dissolve the rennet
Step 3. Use a sharp knife to divide the tablet, then crush 1/4 tablet between two teaspoons. Dissolve 1/4 tablet of rennet in 1/4 cup of water. Note that it will not dissolve completely in the water. Mix thoroughly, then add 1/4 teaspoon of the liquid to the milk.
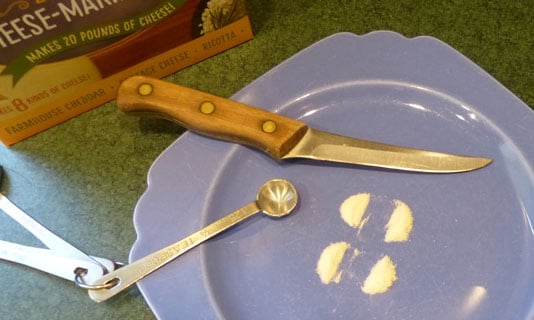
Measure the culture
Step 4. To measure out 1/16 teaspoon of culture, place 1/4 teaspoon of the powder on a clean plate. Use a sharp knife to divide it into four even piles. Each pile is 1/16 teaspoon. Sprinkle 1/16 tsp of C101 mesophilic culture over the surface of the milk and let it absorb for a couple of minutes before stirring it in.
Step 5. Cover the pan of milk and let it sit for 20 to 24 hours at room temperature (68 to 72 degrees F.) Do not stir. The milk will slowly form a thick curd as the solids separate from the liquid whey. Tip: Write the time and date started on a slip of paper and stick it to the pan.
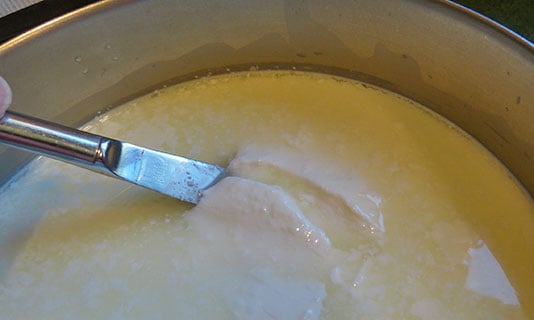
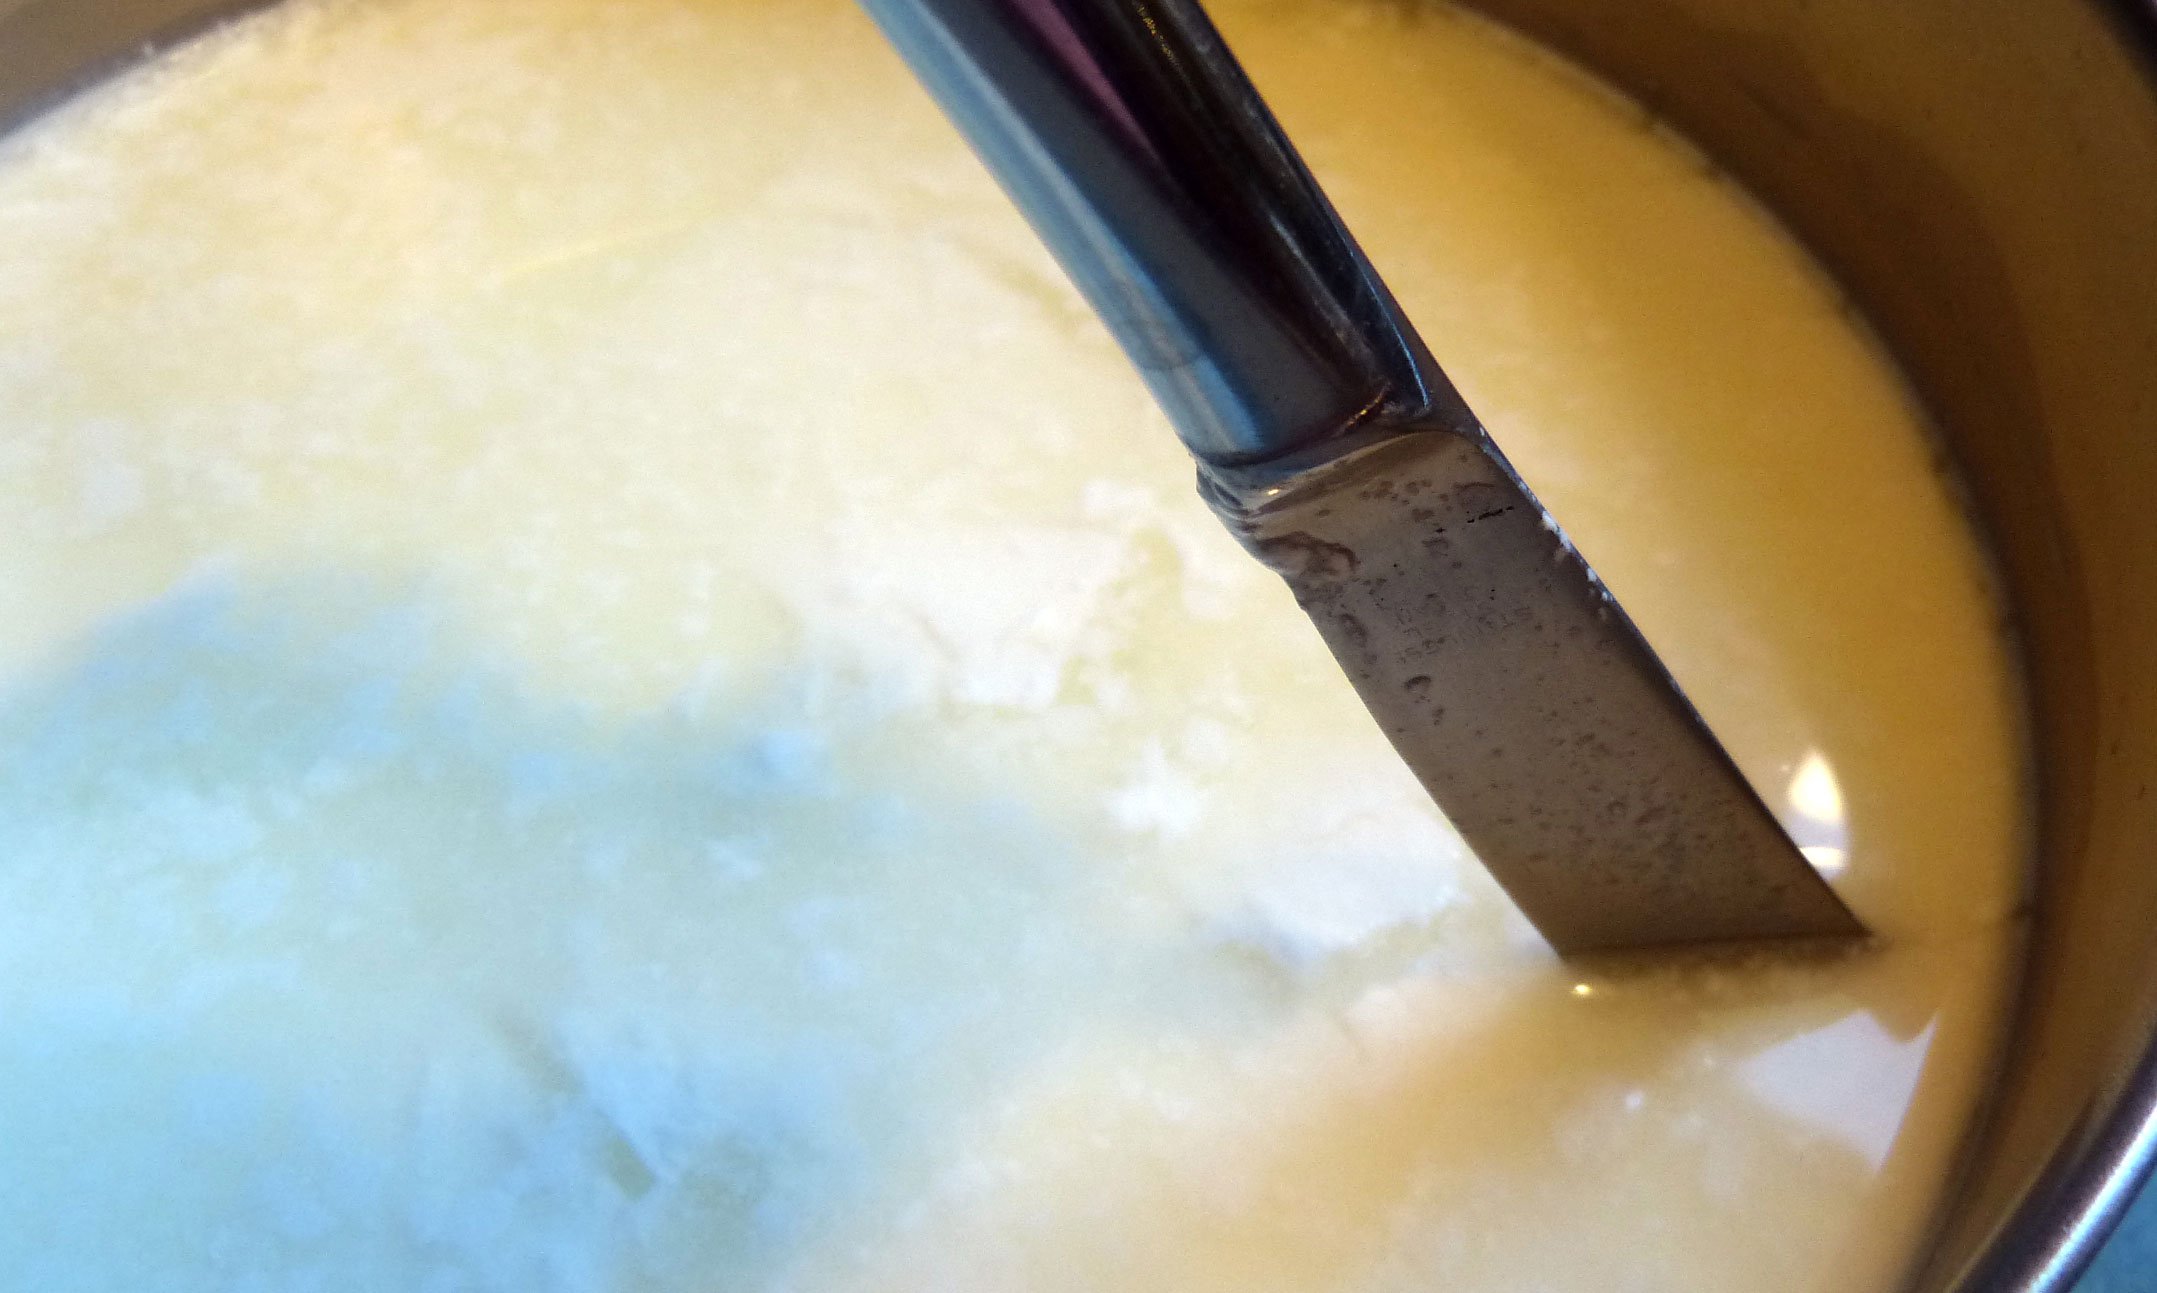
How the curd should look when it breaks
Step 6. After about 20 hours, check the curd. It will begin to separate from the side of the pan and be surrounded by whey. Use a knife or your clean finger to check the curds for readiness. Insert the flat side of knife into the curds and lift gently. When the curd breaks cleanly without too much softness, it's time for the next step. If the curd is still too soft, let it set for another few hours, up to 28 hours. I let my batch rest for 24 hours even though the break was still a bit soft around the edges.

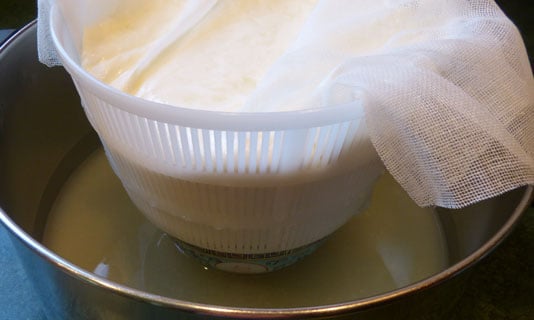
Line a colander
Step 7. Line the colander with clean butter muslin. Cut the muslin so that it drapes over the outside of the colander. I found that the colander that came with the kit only held about half of the curd, so I used an additional colander for the rest of it. Place the colander in a bowl that's slightly larger than the colander.
Cut the curds
Step 8. Cut the curd into half-inch pieces with a long stainless steel knife (see illustration on page 4 of the kit's instruction booklet.) Pushing the knife to the bottom of the pan, make parallel slices 1/2" apart, then turn the pan 90 degrees and repeat to make squares. Insert the knife at angle under the surface of the curd to make cubes and wedges. Work gently.

Transfer the curds to colander
Step 9. Use a slotted spoon to transfer the curds to the colanders. Gently pour the whey through the muslin to get all the curd, if needed. Discard the whey or add to your compost. Note: Whey from chèvre-making is acidic and not suitable for animal feed or adding directly to the garden.
Drain the curds
Step 10. Place the colander on a bowl in a pan to raise it off the bottom; cover and allow the curd to drain for 6 to 12 hours at room temperature, approximately 68 to 72 degrees F. Pour off the whey as it accumulates. The curds in my colander shrunk by half their volume within the first two hours. Shorter draining times yield softer, sweeter, moister cheese. Longer times yield drier, tangier cheese. I prefer a mild flavor and let mine drain for 7 hours.
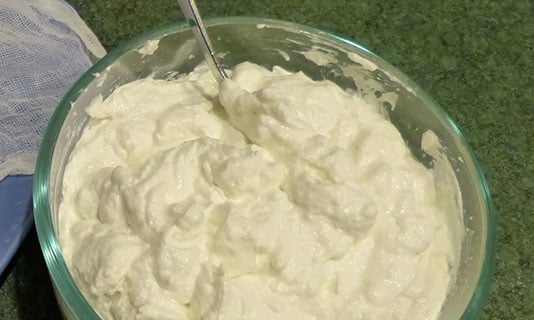
Add salt
Step 11. When the cheese has finished draining, add 3/4 to 1-1/2 teaspoon of non-iodized salt (to taste) and mix it in thoroughly with a fork. The salt stops the bacteria culture from continuing to acidify the cheese and improves the flavor. Your cheese is finished! Store it in a covered container in the refrigerator where it will keep for 7 to 10 days.
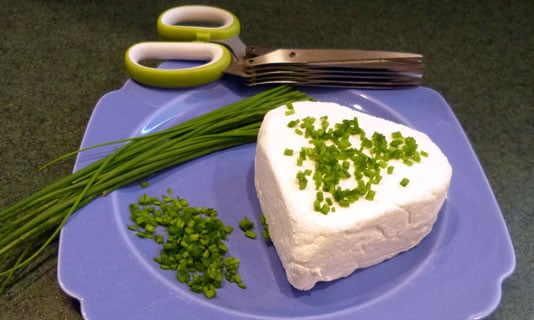
Mold the cheese
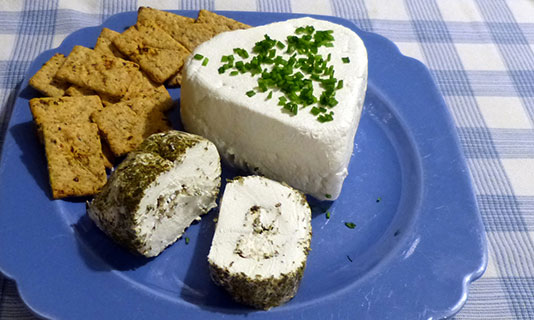
Step 12, optional. Mold the finished cheese into shapes or add herbs. After draining, I transferred some of my cheese to a perforated heart-shaped cheese mold. Line the mold with clean muslin and press the cheese into the shape. Refrigerate overnight on a plate before removing from the mold. Adding freshly snipped chives was genius.
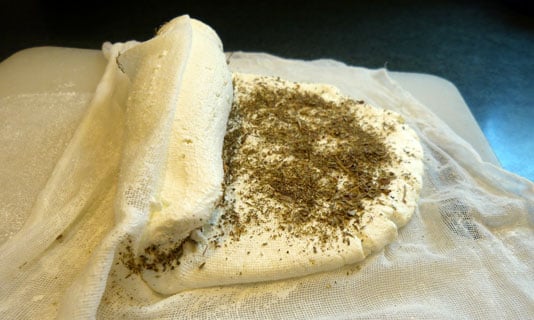
Making and herbed-cheese roll
To make an herbed chèvre roll, I added finely ground dried herbes de Provence (thyme, marjoram, rosemary, oregano, savory and lavender) to another portion of the finished cheese. You can add your own custom blend of fresh or dried herbs. Chives, garlic or black pepper are popular choices. Lay a piece of muslin over a cutting board and flatten the cheese into a rectangle 1/4" to 1/2" thick. Sprinkle with herbs or pepper and roll it up by lifting one end of the muslin. Sprinkle outside of the roll with more herbs, then wrap in cling wrap and refrigerate. Tip: To cut slices of soft, rolled chèvre, use a piece of dental floss.
Making Feta with Goat's and Cow's Milk from a Kit
Feta cheese is a must-have ingredient in a well-dressed Greek salad, and welcome in so many other dishes, as well. I discovered that making my own couldn't be simpler. The Deluxe Cheese-Making Kit contains everything needed to turn a gallon of milk into more than a pound of creamy, crumbly feta cheese.
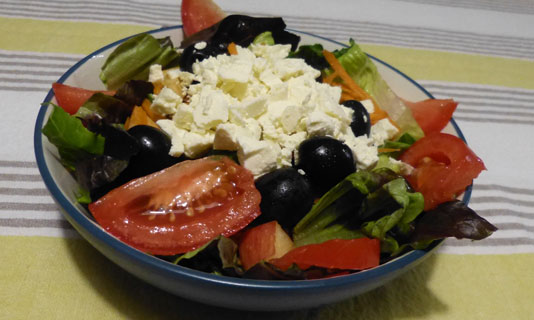
Homemade feta cheese on a Greek salad
I used half cow's milk and half goat's milk in my batch for extra tanginess. The complete recipe with how-to instructions is on page 7 of the booklet that comes in the kit. I did use the optional 1/4 teaspoon of calcium chloride, which made a very firm cheese. Because I like my feta more crumbly, I will leave it out next time. Making feta required more active, hands-on time than the chèvre, but was just as easy and rewarding. Cheese-making will be part of my homestead kitchen from now on.
Last updated: 06/22/2023
Print this Article:
Related Articles
Get the Dirt
Stay up to date on new articles and advice. Please fill out the information below.