A Guide to Pickling and Fermentation
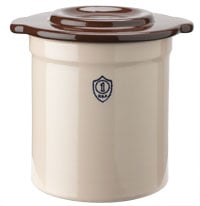
Specially designed crocks make it easy to pickle and ferment fresh vegetables
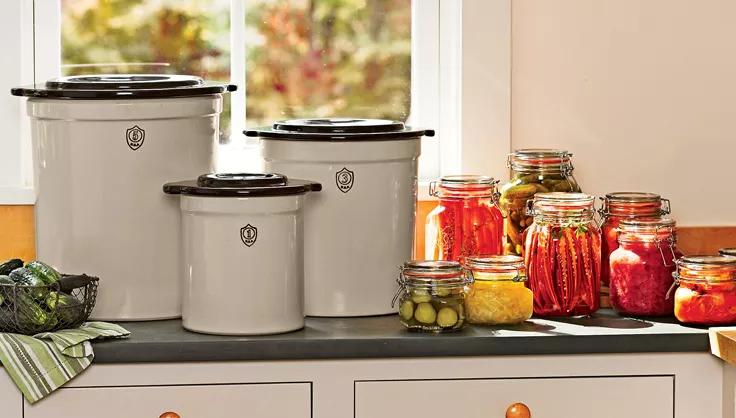
Using specially designed crocks for pickling and fermenting, it's easy to make your own pickles and fermented foods, such as kimchi. Clip-Top Canning Jars are perfect for storing the results.
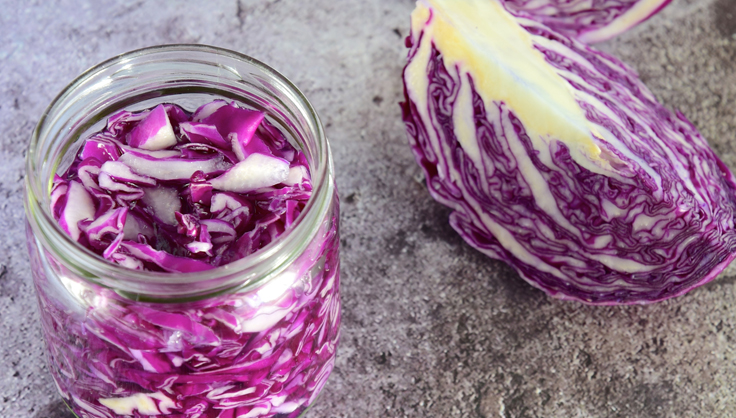
It's a culinary miracle," is all I can think, as I reach deep into the 3-gallon fermenting crock and pull out handfuls of the most beautiful, garnet-red sauerkraut I've ever seen. As I start packing the kraut into jars, I'm taking little tastes and it's delicious, absolutely delicious. But I already knew that because, in the six weeks since I'd packed the red cabbage, salt and caraway seeds (just three ingredients!) into the crock, I'd been dipping in regularly to check the progress. It had been improving continually, the saltiness receding and the flavors becoming more tangy and complex.
As a newbie to fermentation, the process was somewhat of a leap of faith. I knew enough about microbiology to know that the air we breathe and the surfaces we touch are teeming with yeasts, molds and bacteria. But how could it be possible that by simply adding salt to vegetables, the right organisms would take over and make this preserving fermentation happen? But it does work, and it's incredibly easy to do.
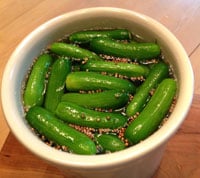
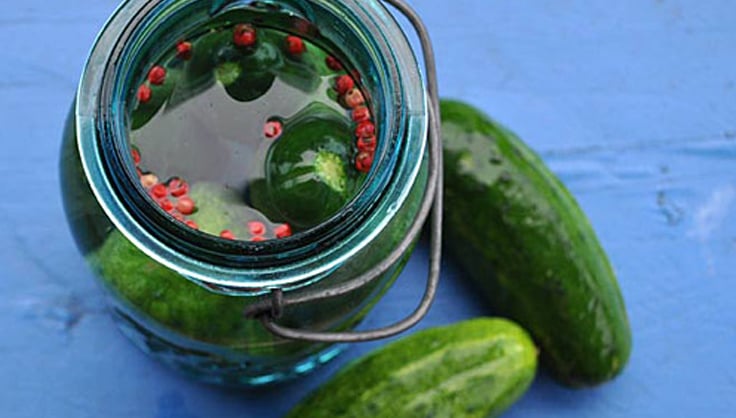
Cucumbers in a pickling crock.
My Recipes
Use fermenting and pickling crocks to make these delicious treats:
Pickling vs. Fermentation
Fermenting and pickling are two methods of preserving food, although the results often appear similar. In pickling, vinegar and/or salt are added to foods, such as cucumbers, beets, eggs and meats, to preserve them. Fermenting, on the other hand, employs naturally occurring yeasts, bacteria, enzymes and/or fungi to transform and preserve foods by converting carbohydrates into carbon dioxide, alcohols and organic acids. Salt and other ingredients are frequently used to control or influence the process, as well as add flavor to the food. Although liquid is often added in the fermenting process, the moisture-rich vegetables themselves may provide much or all of the preserving liquid.
Sandor Katz, the author of The Art of Fermentation, a food-preservation guide, calls fermentation the "creative space" between fresh and spoiled food. Not necessarily appetizing, but, if you think about it, we enjoy bread, wine, beer, yogurt, cheese, buttermilk and other delicious foods that go through the fermentation transformation. Kevin West is a certified Master Food Preserver (University of California Cooperative Extension) and author of Saving the Season: A cook's guide to home canning, pickling and preserving. He says we need to rethink our belief that bacteria and other microbes are bad. Submerging your vegetables in saltwater brine, says West, "protects them from mold, spores and yeast, which are in the air. Salt also regulates the microenvironment, encouraging a succession of beneficial bacterial colonies to bloom."
The alternative to submerging the vegetables in brine is to salt and bruise them, usually by hand-massaging, to extract the natural juices from the vegetables so that they still end up covered in liquid. This process is sometimes called a dry brine and is used to make sauerkraut, as well as kimchi, a spicy fermented-vegetable dish popular in Korea. Known as lacto-fermentation, the process uses salt to help the good bacteria, which are already on the vegetables, go through a metabolic process that creates an acidic environment and eliminates harmful pathogens. The results are fermented foods that have a pleasant sour taste from the acid. In addition, these foods will last much longer than they would in their fresh state. And as West notes, the Centers for Disease Control has never had a reported case of anyone getting sick from home-fermented foods. It's safe and it works every time, he says.
To make your own delicious fermented vegetables, such as sauerkraut, kimchi and all varieties of sour pickles, follow these steps.
Choosing Your Vegetables
Pretty much any vegetable (or fruit) can be fermented. Although we often think first of cucumbers for pickling or fermenting, you might also consider summer squash, green tomatoes, beans and peas in their pods, cabbages and other greens, carrots, onions, radishes and turnips.
As with any cooking project, always choose quality ingredients. Start with young, crisp vegetables that are free of any bruises or defects. Scrub them under cool running water to remove any dirt. If you're pickling or fermenting a vegetable that has a blossom, such as a cucumber or zucchini, trim that end off to remove flower enzymes that often cause the pickles to soften.
Vegetables, such as cukes, tomatoes, asparagus and green beans, can be fermented whole or cut into cubes or slices. The advantage of the latter is that the smaller pieces have more surface area to ferment and absorb flavor.
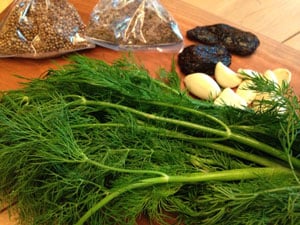
Ingredients for cucumber pickles: coriander seeds, dill seeds, chipotle chiles, garlic and fresh dill.
Adding Flavors
Along with your vegetables, you may choose to add flavoring ingredients, such as fresh herbs; and whole or crushed spices, such as mustard seed or peppercorns. You can also add aromatics, such as garlic, garlic scapes, scallions or onions. For my sauerkraut, I simply use caraway seeds, but for a batch of more complex-flavored cucumber pickles, I add garlic, fresh dill, crushed coriander and dill seeds, and even a few dried chipotle chilies for a touch of smoky heat. Use pickling recipes for guidance or get creative and add flavors to suit your particular tastes.
Salt of the Earth (or Sea)
Salt has several functions in the fermentation process, including adding flavor and hardening the vegetables' natural pectin, which makes your final product more crunchy.
Most importantly, the salt regulates the speed of fermentation. Saltier brine slows down the process, which allows flavors more time to develop and gain complexity, and will ultimately extend the shelf life of your product. On the flip side, less salt means your vegetables will ferment more quickly, but not last as long.
Since heat also affects the speed of fermentation (the warmer it is, the faster it goes), you may want to use more salt during the warmer months to slow things down, and less during the autumn and winter when ambient temperatures are lower.
The choice of what kind of salt to use to create the brine is important, but with one or two exceptions, you have quite a bit of flexibility in this area. When choosing a salt, the only types to avoid are processed ones that have iodine added, which will cause your pickles to darken and soften.
Pickling salt is useful because it dissolves quickly in water, as does kosher salt. Sea salts and unprocessed mined salts, West points out, have trace amounts of minerals that may improve texture, flavor and possibly even add some nutritional value.
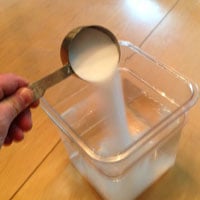
Salt
How Much Salt is Enough?
Typically, fermenting brine is roughly a 5 percent solution or about one-half an ounce of salt per quart of water. With dry brining, such as for sauerkraut or kimchi, the rule of thumb is to use an amount of salt equal to about 5 percent of the weight of your vegetables. For 5 pounds of vegetables, for example, use 4 ounces of salt. (5 pounds x 16 ounces = 80 ounces. 80 x .05 = 4 ounces) West recommends measuring salt by weight because it's more accurate. Different size salt crystals can yield widely varying cup measures.
Keep in mind the level of saltiness you hope to end up with and the desired speed of your ferment, and remember that there is no single "right" quantity of salt to add, so you can experiment and be confident that the process will work.
All Water isn't the Same
It's always best to use spring or well water for fermentation. Even bottled spring or distilled water is a good choice. Most municipal tap water has antimicrobial agents, such as chlorine. You don't want to kill off all those good bacteria.
Choosing Your Fermentation Vessel
You can ferment or pickle in almost any container, as long as it is food-safe and has enough room for the vegetables and brine to cover them. A fitted lid keeps out flies or any other uninvited critters.
Ceramic fermenting and pickling crocks are the best choice because they have plenty of room (without everything splashing out when you're moving it) and are sturdy enough to pack down your ingredients to remove any pockets of air, which you'll need to do, especially when making sauerkraut, kimchi or other fermented foods.
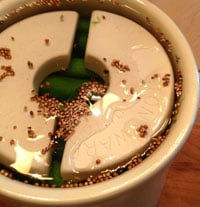
Some crocks have a convenient moat on the top rim, which can be filled with water. When the lid is in place this creates a sort of airlock that allows the gases created during the fermentation to escape while preventing air (with all its mold and yeasts) from getting back in.
If you use glass canning jars for fermenting, be sure to leave the tops a bit loose to prevent gas buildup, which could lead to a messy explosion.
You can also ferment in a food-safe plastic tub or container, but be sure to use something that's BPA-free so you don't risk having harmful chemicals leach into the foods.
Weights keep ingredients submerged in the brine.
Weighting
Once your vegetables are in the crock and submerged in the brine, it's essential to keep them there. Contact with the air will make your product darken; become mushy and, even worse, moldy. The best crocks come with half-donut-shaped ceramic weights for this purpose. You can also use a heavy ceramic plate or in a pinch a zipper-top plastic bag filled with more brine instead of water, in case it leaks.
Location, Location, Location
The placement of your filled crock is important because the ambient temperature will affect the rate of fermenting: warmer speeds things up and cooler slows it down. According to West, the ideal temperature is somewhere between about 55 and 75 degrees. In many instances, a cellar falls within this range and the temperature tends to stay more constant down there.
Waiting, Watching, Skimming the Scum and Tasting
Now you wait. The fermenting begins after a few days, and the brine will begin to bubble and foam will form on the surface. But other things may form on the surface as well, such as a thin film of white yeast and an occasional button of mold. As alarming as this may seem, these are positive signs that your ferment is alive and well.
Check the crock daily and skim off any of these yeasts or molds using a slotted spoon or flat kitchen skimmer. If mold grows on the walls of the crock, simply wipe it off with a clean rag or paper towel.
And, by all means, start tasting your product after a few days. It's one of the true joys of the fermenting process to see how your vegetables change in flavor and texture over time. This will also tell you when your ferment is done, which, simply put, is when it tastes good to you. My sauerkraut was delicious after about ten days, but was truly spectacular (if I must say so myself) after six weeks.
At this point, refrigerating the vegetables will stop the fermentation process.
Storing Your Preserved Goodies
When your fermenting vegetables have matured to the desired flavor, pack them in clean jars and cover completely with brine. If you like, you can transfer some of the aromatics to the jars, as well. If the results seem too salty or strongly flavored, you can add a mixture of half brine and half distilled water to mellow the flavor.
Tightly sealed and stored in the refrigerator, your fermented vegetables will likely keep for several months. For longer storage — either in or out of the refrigerator — follow the canning instructions that come with your jars.
Last updated: 06/15/2023
Print this Article:
Related Articles
Get the Dirt
Stay up to date on new articles and advice. Please fill out the information below.