
Classroom Composting
Worms Teach Students About World Citizenship

Last updated: March 4, 2025 | 5 min read
World history, sustainability and vermiculture. It may sound like an unlikely combination, but to the 7th graders in my neighbor Patty Brushett's history class, it makes perfect sense.
Patty has been teaching 7th grade world history for 25 years. She loves exploring the history and culture of foreign lands with her students. But she confesses to having ulterior motives in her curriculum. At the top of that list is helping kids see that our country consumes more than its share of natural resources, and that this behavior has global ramifications. Patty believes we all need to consume less and waste less. And this is where the worms come in.
As an avid gardener with a big vegetable garden, Patty has lots of experience with composting, and she believed it would be a great way to teach kids about sustainability. The idea of worm composting was appealing because it meant she and her students could compost indoors during the winter months. Worms also make the decomposition process go very quickly—important when you're dealing with the attention span of 12-year olds.
 Children and young adults enjoy the care and feeding of worms. "When the worms are healthy and happy, they know it's a direct result of their actions," says teacher Patty Brushett.
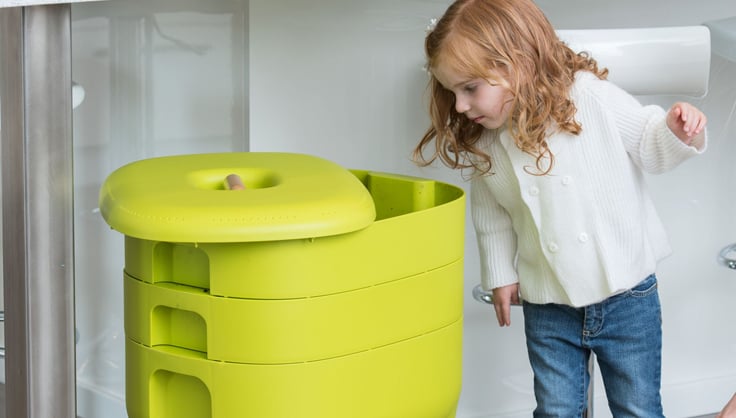
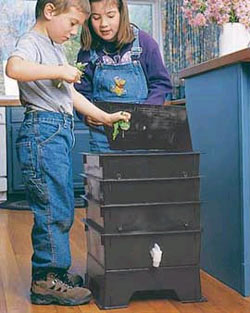
So several years ago, she requested a worm composting bin for her classroom through a Gardener's Supply-sponsored vermiculture program, and set out to engage her students in making compost. She brings kitchen scraps from her own kitchen to school almost every morning. Students take turns adding the scraps to the worm bin. They're also invited to add discarded bits from their own snacks and lunches.
Though Patty engages her whole class in managing the worm bin, she finds there are always five or six children who really take to the worms. Parents confirm that for these hands-on-learners, the worms become central to their classroom experience. "The kids feel like they're doing something important," says Patty. "Most 12-year-olds have spent their entire lives being nurtured by parents and other adults. The worms give these kids responsibility for nurturing something themselves. They really care about the well-being of these worms. When the worms are healthy and happy, they know it's a direct result of their actions."
Over the course of the school year, everyone in Patty's class gets a chance to work with the worms. But as you might expect, there are some kids who can barely stand to think about worms and kitchen scraps, much less consider touching them. She says, "I knew this worm composting project would be truly successful when every child in the class was eager to help out—including the girls who only wear pink."
With this in mind, last year she undertook a special project. "When September rolled around," she recalled, "I asked my new class: How do we make worm composting not an "ooey" thing so everyone will get involved? The kids and I set out to prove it could be done." Patty knew that if they were successful in the classroom, worm composting might also be more appealing to parents and other adults. This would fulfill another of her "ulterior motives" for teaching: to stimulate earth-friendly changes in the home, using knowledgeable, enthusiastic students as the agents for change.
Over the course of the school year, Patty and her students sought to fine-tune their worm bin by closely managing moisture, carbon and nitrogen. They eliminated any problems with fruit flies (they no longer put fruit in the worm bin). They eliminated any odors (by always adding dry ingredients along with kitchen scraps). They also solved one of the most "ooey" problems: how to remove worms from the finished compost without touching them (remove the top and expose the finished tray to the air for a week, skimming off finished compost as worms migrate into the tray below).
Additional methods for removing worms include a technique called "baiting." This is one of the most common methods and involves placing food scraps in one area of the compost pile and allowing the worms to migrate toward it over a few days. Once the worms gather in the new section, you can carefully collect them, leaving the finished compost behind. Another method is sifting the compost through a mesh screen, which helps separate the worms from the fine, crumbly compost.
The project was a terrific success. Tending the worms became an activity that engaged virtually everyone in the class. Several other classrooms are considering getting worm bins, and a few students even convinced their parents to give it a try.
Tips from Patty and her students about how to keep a worm bin smelling sweet and running fast:
- Not Too Wet. We found there's a certain moisture level that worms like. It's the least amount of moisture you can have and still maintain the process. The material in the bin should be damp, but definitely not wet. We add dry carbon materials to the bin every time we add kitchen scraps.
- Mix Stuff In. If the food in your compost pail smells, you can figure it will smell just as much when it's inside the worm bin. To control odor, we always fold in the kitchen scraps, covering them with dry, carbon-rich materials, such as shredded paper and crumbled dry leaves. These materials absorb excess moisture, and the mixing (which we do with a long slotted metal spoon) incorporates oxygen.
- Chop Things Up. I have the kids collect leaves in the fall. We dry them out and then store them in trash bags. Before adding them to the bin, the kids crumble them up so pieces are less than 2-inches square. We also use shredded newspaper, which students cut down into 2-inch lengths, and also the round holes from inside the school's paper punch. Food scraps should be chopped into 1-inch chunks so everything will get chewed up in approximately the same amount of time.
- Be Selective. We don't put any fruit in the worm bin. We also don't add egg shells, bread or pasta, meat, dairy products or oils. All these things are difficult for worms to digest. When we make it easy for them, they make it easy for us.
Classroom Composting FAQs
-
How does classroom composting provide a hands-on learning experience?
Composting in the classroom provides students with a practical, interactive lesson in sustainability. By participating in the composting process, students gain firsthand knowledge of how organic waste is transformed into valuable soil, reinforcing environmental stewardship and science education. -
How does classroom composting promote waste reduction?
Implementing composting in the classroom helps reduce food waste and encourages eco friendly habits. Students can recycle leftover fruit and vegetable scraps, reducing the amount of waste that ends up in landfills while learning about the importance of waste diversion. -
How does classroom composting supports science and ecology education?
Classroom composting aligns with science curriculums, allowing students to study topics such as decomposition, ecosystems, and the carbon cycle. It provides an engaging way to understand ecological processes and the critical role of organisms like worms in soil health. -
How does compost improve plant growth?
The finished compost generated in classroom projects can be used to fertilize plants, demonstrating the direct benefits of composting. This hands-on approach not only nurtures student interest in gardening but also shows how composting can enhance plant growth by providing nutrient-rich soil.
Relevant Reading
- Cornell University's Composting Program: Features a section dedicated to school composting, offering insights into integrating composting into educational settings. https://compost.css.cornell.edu/SchoolCompostingLetsGetGrowing.pdf
- Compost Man Stan: Provides a variety of composting educational materials, such as guidebooks, card games, and posters, suitable for classroom use. https://www.stanslaughter.com/resources/
Print this Article:
Get the Dirt
Stay up to date on new articles and advice. Please fill out the information below.